QR Code Scanner or Reader Using HTML, CSS, and JavaScript
Today, QR codes are a real trend; they can be placed on any product’s package, in digital menus, and even used for contactless payments.
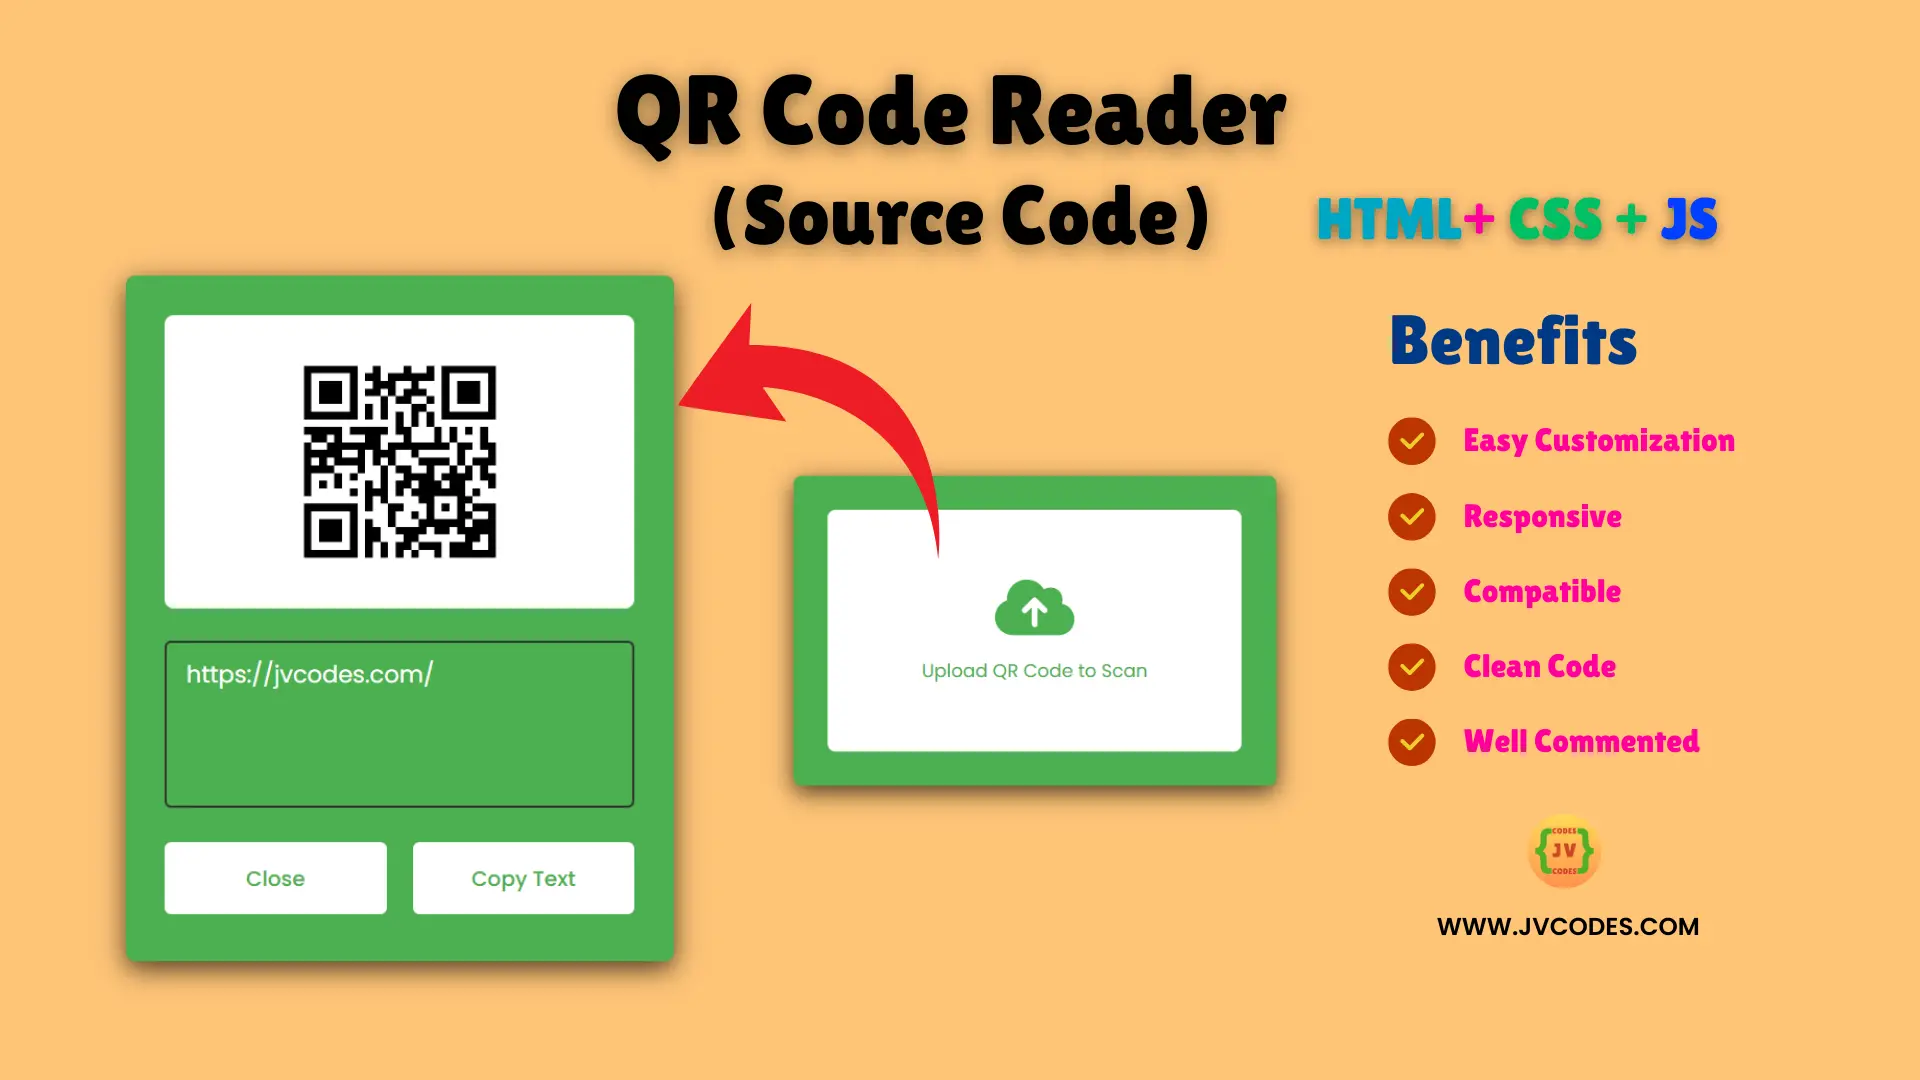
A QR Code Scanner or Reader can be described as a strong and basic application that allows users identify QR codes without delay.
If you are trying to create one, from scratch, then this blog will outline the process for you. The best part? Well here are free source codes to get you headed in the right direction!
GitHub Source: QR Code Reader
Features
- Easy to Customize: It is an easy code and when you need to alter something, then you are able to do so easily.
- Responsive: It also functions perfectly on all the desktops, PDA’s, laptops, portable PCs and mobile phones.
- Compatibility: Supports the standard web browsers such as google chrome, Mozilla Firefox, Microsoft Edge, etc.
- Clean Code: Well written which makes it clear and easier to follow and of course to debug.
Technologies Used
- HTML (Hypertext Markup Language)
- CSS (Cascading Style Sheets)
- JS (JavaScript)
Recommended for You
- QR Code Generator
- Animated Responsive Pricing Table
- 3 Cards Responsive Transparent Pricing Table
- 4 Cards Responsive Pricing Table with Animation
- Modern Animated Pricing Table
Video Tutorial
Steps to Build Responsive QR Code Reader
- Create Project Folder: First of all, make a folder where you will be saving your files.
- Create index.html: The structure for the QR code scanner will be contained in this file.
- Create style.css: This file will define how the scanner interface will look like and will also make the interface ‘lipstick’ ready.
- Create script.js: This file will contain JavaScript code that will be used to read QR code.
- Copy & Paste the Code Given Below: Actualize your project using the source code given in your pack.
HTML
Here is the HTML code for your index.html file:
<!DOCTYPE html>
<!--
  QR Code Scanner or Reader
  Coding By JV Codes - youtube.com/@jvcodes
-->
<html lang="en" dir="ltr">
<head>
  <!-- Metadata Section -->
  <meta charset="utf-8">
  <title>QR Code Scanner or Reader | JVCodes.Com</title>

  <!-- Link to External CSS -->
  <link rel="stylesheet" href="style.css">

  <!-- Responsive Design: Ensures the page scales properly on all devices -->
  <meta name="viewport" content="width=device-width, initial-scale=1.0">

  <!-- Font Awesome Icons for UI elements -->
  <link rel="stylesheet" href="https://cdnjs.cloudflare.com/ajax/libs/font-awesome/6.1.1/css/all.min.css">
</head>
<body>
  <!-- Wrapper for the entire content -->
  <div class="wrapper">
    <!-- Form to handle file input -->
    <form action="#">
      <!-- Hidden File Input for Uploading QR Code -->
      <input type="file" hidden>
      <!-- Placeholder for displaying the uploaded QR code -->
      <img src="#" alt="qr-code">
      <!-- Content Section for Upload Instructions -->
      <div class="content">
        <!-- Upload Icon -->
        <i class="fas fa-cloud-upload"></i>
        <p>Upload QR Code to Read</p>
      </div>
    </form>
    <!-- Details Section -->
    <div class="details">
      <!-- Text Area to display QR code content -->
      <textarea spellcheck="false" disabled></textarea>
      <!-- Buttons for user actions -->
      <div class="buttons">
        <!-- Button to Close the details section -->
        <button class="close">Close</button>
        <!-- Button to Copy Text from the Text Area -->
        <button class="copy">Copy Text</button>
      </div>
    </div>
  </div>
  <!-- JavaScript File -->
  <script src="script.js"></script>
</body>
</html>
CSS
Here is the complete code for style.css file to style the QR code scanner:
/* Import Google Font - Poppins */
@import url('https://fonts.googleapis.com/css2?family=Poppins:wght@400;500;600;700&display=swap');

/* Global Reset and Font Family */
* {
  margin: 0;
  padding: 0;
  box-sizing: border-box;
  font-family: 'Poppins', sans-serif;
}

/* Body Styling: Center content with a flexible layout */
body {
  display: flex;
  align-items: center;
  justify-content: center;
  min-height: 100vh;
  padding: 0 10px;
  background: #F9F6F2;
}

/* Wrapper Styling: Main container for the QR scanner */
.wrapper {
  height: 270px;
  width: 420px;
  border-radius: 7px;
  background: #4CAF50;
  padding: 30px 30px 35px;
  transition: height 0.2s ease;
  box-shadow: 0px 6px 20px rgba(0, 0, 0, 0.7);
}

/* Wrapper Expanded State */
.wrapper.active {
  height: 525px;
}

/* Form Styling: Centered box for file upload */
.wrapper form {
  height: 210px;
  display: flex;
  cursor: pointer;
  user-select: none;
  text-align: center;
  border-radius: 7px;
  background: #fff;
  align-items: center;
  justify-content: center;
  transition: height 0.2s ease;
}

/* Form Styling for Active State */
.wrapper.active form {
  height: 225px;
  pointer-events: none;
}

/* Form Image Styling */
form img {
  display: none;
  max-width: 148px;
}

.wrapper.active form img {
  display: block;
}

/* Content inside Form */
.wrapper.active form .content {
  display: none;
}

/* Upload Icon Styling */
form .content i {
  color: #4CAF50;
  font-size: 55px;
}

/* Upload Text Styling */
form .content p {
  color: #4CAF50;
  margin-top: 15px;
  font-size: 16px;
}

/* Details Section: Initially Hidden */
.wrapper .details {
  opacity: 0;
  margin-top: 25px;
  pointer-events: none;
}

/* Details Section: Shown in Active State */
.wrapper.active .details {
  opacity: 1;
  pointer-events: auto;
  transition: opacity 0.5s 0.05s ease;
}

/* Text Area Styling */
.details textarea {
  width: 100%;
  height: 128px;
  outline: none;
  resize: none;
  color: #fff;
  font-size: 18px;
  background: none;
  border-radius: 5px;
  padding: 10px 15px;
  border: 2px solid #333;
}

/* Scrollbar Styling */
textarea::-webkit-scrollbar {
  width: 0px;
}
textarea:hover::-webkit-scrollbar {
  width: 5px;
}
textarea:hover::-webkit-scrollbar-track {
  background: none;
}
textarea:hover::-webkit-scrollbar-thumb {
  background: #333;
  border-radius: 8px;
}

/* Buttons Container */
.details .buttons {
  display: flex;
  margin-top: 20px;
  align-items: center;
  justify-content: space-between;
}

/* Buttons Styling */
.buttons button {
  height: 55px;
  outline: none;
  border: none;
  font-weight: 500;
  font-size: 16px;
  cursor: pointer;
  color: #4CAF50;
  border-radius: 5px;
  background: #fff;
  transition: transform 0.3s ease;
  width: calc(100% / 2 - 10px);
}

/* Button Press Animation */
.buttons button:active {
  transform: scale(0.95);
}

/* Responsive Design for Small Screens */
@media (max-width: 450px) {
  .wrapper {
    padding: 25px;
    height: 260px;
  }
  .wrapper.active {
    height: 520px;
  }
}
JavaScript
Here is the complete code for script.js file to function the QR code reader:
const wrapper = document.querySelector(".wrapper"),
form = document.querySelector("form"),
fileInp = form.querySelector("input"),
infoText = form.querySelector("p"),
closeBtn = document.querySelector(".close"),
copyBtn = document.querySelector(".copy");

function fetchRequest(file, formData) {
    infoText.innerText = "Scanning QR Code...";
    fetch("http://api.qrserver.com/v1/read-qr-code/", {
        method: 'POST', body: formData
    }).then(res => res.json()).then(result => {
        result = result[0].symbol[0].data;
        infoText.innerText = result ? "Upload QR Code to Scan" : "Couldn't scan QR Code";
        if(!result) return;
        document.querySelector("textarea").innerText = result;
        form.querySelector("img").src = URL.createObjectURL(file);
        wrapper.classList.add("active");
    }).catch(() => {
        infoText.innerText = "Couldn't scan QR Code";
    });
}

fileInp.addEventListener("change", async e => {
    let file = e.target.files[0];
    if(!file) return;
    let formData = new FormData();
    formData.append('file', file);
    fetchRequest(file, formData);
});

copyBtn.addEventListener("click", () => {
    let text = document.querySelector("textarea").textContent;
    navigator.clipboard.writeText(text);
});

form.addEventListener("click", () => fileInp.click());
closeBtn.addEventListener("click", () => wrapper.classList.remove("active"));
Download Source Code
The source code this QR Code Scanner or Reader using HTML, CSS, and JavaScript is available below for download. This code is Public Domain, you can copy and modify this code without permission or attribution.
Conclusion
This QR Code Scanner or Reader is easy and effective that anyone may implement into his website. Not only will you incorporate more interaction in your site but also you acknowledge the credit of JV Source Codes by linking back to us.
If you have any further questions or problems, feel free to leave a comment below. I’ll be happy to assist you! You should also remember to subscribe to my channel for exclusive other helpful tutorials and source codes.

