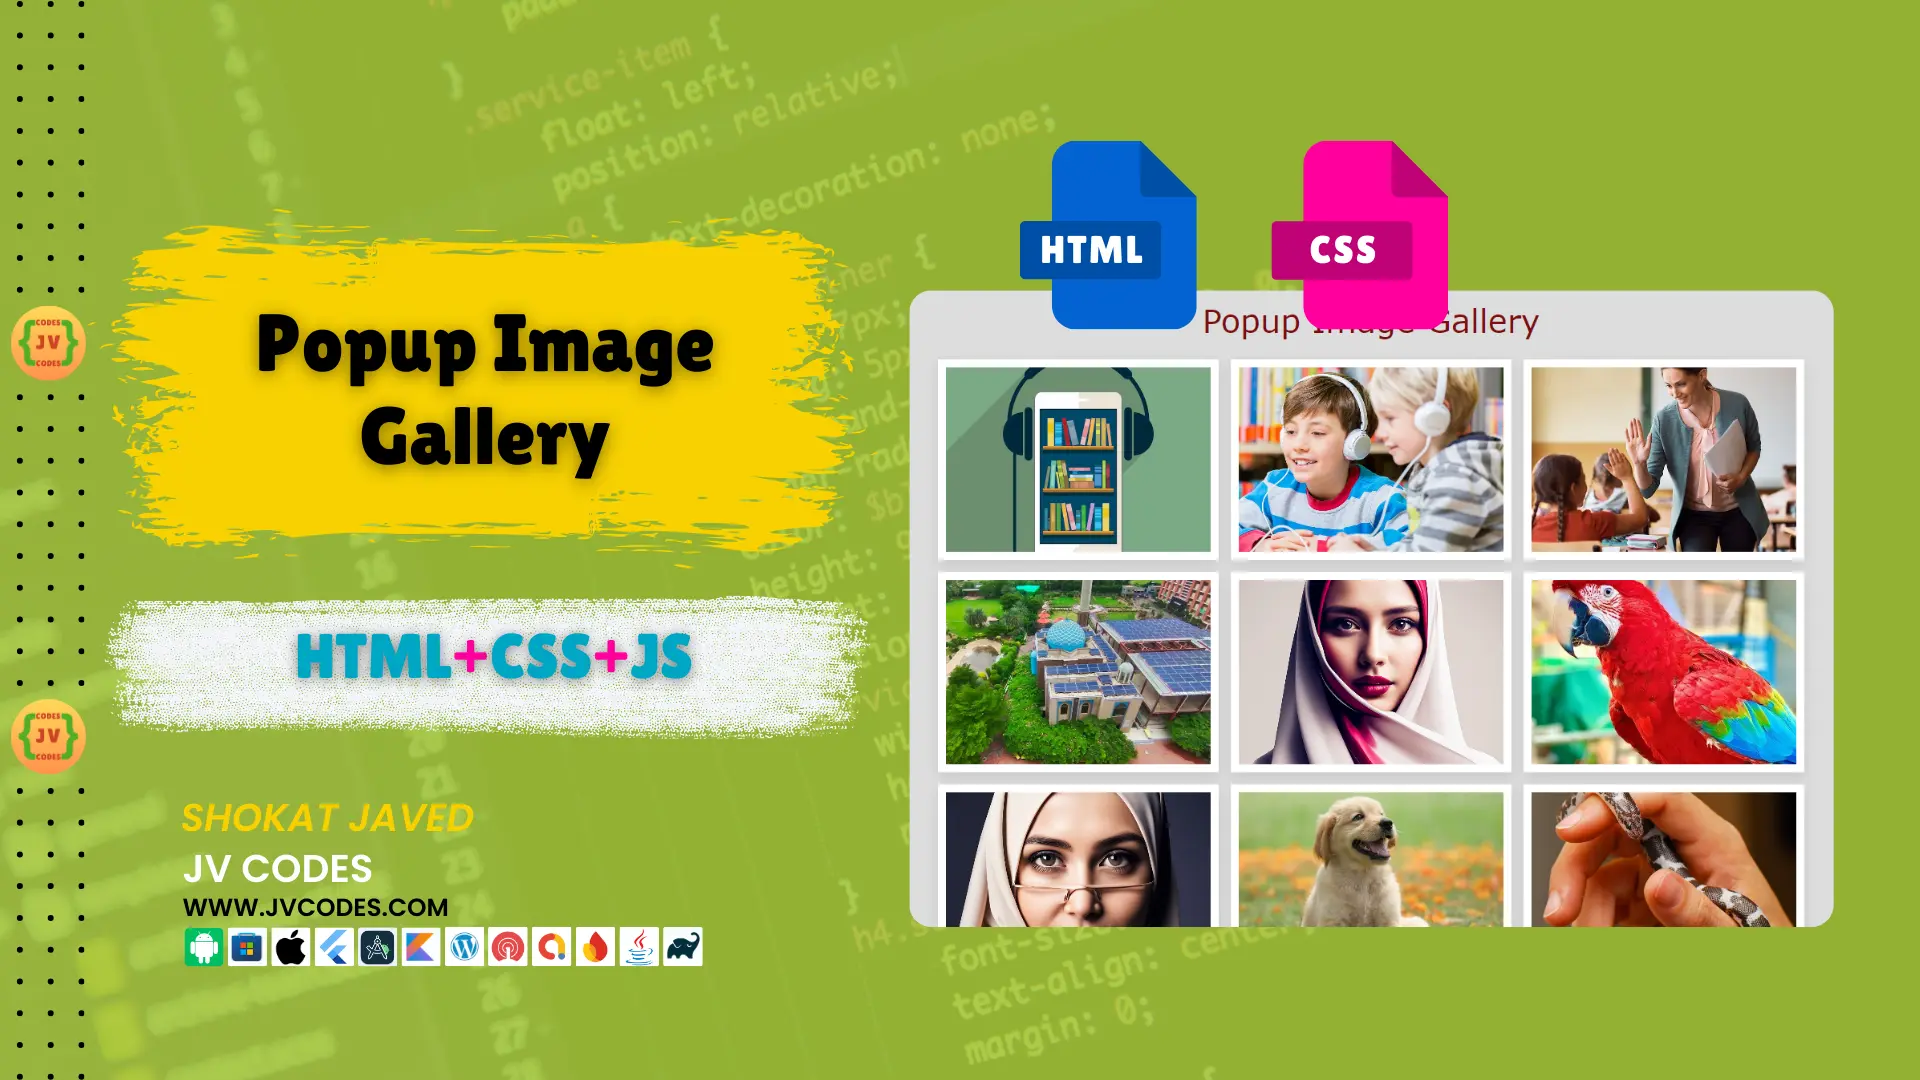
Popup Image Gallery in HTML, CSS and JavaScript
Having an attractive and engaging image gallery on your website can have a powerful positive impact on the site’s activity. In this article, I am going to give you free source codes so that you can develop Popup Image Gallery in HTML, CSS, and JavaScript.
GitHub Source: Popup Image Gallery
The gallery is also simple to put into action while at the same time highly flexible and can be implemented across different interfaces. If you’re interested in learning how to build such an image gallery without compromising your design, this article will help you, step by step.
Want free codes for stunning image sliders? Dive in now!
- Modern Image Slider
- Responsive Image Slider
- Text Overlay Image Slider
- Image Clip Animation Slider
- Image Comparison Slider
Features
The Popup Image Gallery includes several powerful features:
- Responsive Design: Due to its responsiveness, the gallery can be used optimally on a large computer screen, a tablet or a Smartphone.
- Smooth Image Transitions: Pictures smoothly zoom and open on a new window in a ‘wandersmith’ manner to give the web page a modern look.
- Easy Customization: Compared to other gallery, this can be easily configured with their design.
- Compatible with All Modern CMS: This gallery also supports popular Content Management systems including WordPress and custom HTML interfaces.
Technologies Used
The Popup Image Gallery is created using the following technologies:
- HTML
- CSS
- JavaScript
Video Preview
You can preview the Popup Image Gallery in the following video:
Steps to Build Popup Image Gallery
Here’s how you can build the Popup Image Gallery step by step:
- Create a Folder Named “Image Gallery”: Begin by opening a folder where all the files that belongs to the project will be saved.
- Create an Images Folder: Inside the “Image Gallery” folder create a new folder which will be used to store the images for you gallery and name it “images”.
- Create index.html File: This file will consist of the structure of your gallery in HTML.
- Create style.css File: This file will be used to style the gallery and make it beautiful by applying CSS on the HTML file.
- Create script.js File: This JavaScript file will contain the functions that will determine how images will be transitioned and how the popup will be handled.
To implement code you may need VS Code Installation.
HTML
Here is the HTML code for your index.html file.
<!DOCTYPE html>
<html lang="en">
<head>
<meta charset="UTF-8">
<meta name="viewport" content="width=device-width, initial-scale=1.0">
<title>Responsive Popup Image Gallery - JV Codes</title>
<link rel="stylesheet" href="style.css">
</head>
<body>
<div class="container">
<h1>Popup Image Gallery</h1>
<div class="image-container">
<div class="image"><img src="images/img-1.jpg" alt="Image 1"></div>
<div class="image"><img src="images/img-2.jpg" alt="Image 2"></div>
<div class="image"><img src="images/img-3.jpg" alt="Image 3"></div>
<div class="image"><img src="images/img-4.jpg" alt="Image 4"></div>
<div class="image"><img src="images/img-5.jpg" alt="Image 5"></div>
<div class="image"><img src="images/img-6.jpg" alt="Image 6"></div>
<div class="image"><img src="images/img-7.jpg" alt="Image 7"></div>
<div class="image"><img src="images/img-8.jpg" alt="Image 8"></div>
<div class="image"><img src="images/img-9.jpg" alt="Image 9"></div>
</div>
<div class="popup-image">
<span>×</span>
<img src="" alt="Popup Image">
<div class="prev">❮</div>
<div class="next">❯</div>
</div>
</div>
<!-- Link to external JavaScript file -->
<script src="script.js"></script>
</body>
</html>CSS
This is the CSS file that is used to make the proper layout for the gallery.
* {
  margin: 0;
  padding: 0;
  box-sizing: border-box;
}

.container {
  position: relative;
  min-height: 100vh;
  background: #ddd;
}

.container h1 {
  font-size: 40px;
  font-family: Verdana, Geneva, Tahoma, sans-serif;
  font-weight: normal;
  padding: 15px;
  color: #7e0d0d;
  text-align: center;
  text-transform: capitalize;
}

.image-container {
  display: flex;
  flex-wrap: wrap;
  gap: 15px;
  justify-content: center;
  padding: 10px;
}

.image {
  height: 250px;
  width: 350px;
  border: 10px solid #fff;
  box-shadow: 0 5px 15px rgba(0, 0, 0, .1);
  overflow: hidden;
  cursor: pointer;
}

.image img {
  height: 100%;
  width: 100%;
  object-fit: cover;
  transition: transform 0.5s ease, filter 0.5s ease;
}

.image:hover img {
  transform: scale(1.1);
  filter: grayscale(100%);
}

.popup-image {
  position: fixed;
  top: 0;
  left: 0;
  background: rgba(0, 0, 0, .9);
  height: 100%;
  width: 100%;
  z-index: 100;
  display: none;
  justify-content: center;
  align-items: center;
}

.popup-image span {
  position: absolute;
  top: 20px;
  right: 30px;
  font-size: 40px;
  font-weight: bold;
  color: #fff;
  cursor: pointer;
}

.popup-image img {
  position: absolute;
  top: 50%;
  left: 50%;
  transform: translate(-50%, -50%);
  border: 5px solid #fff;
  border-radius: 5px;
  width: 90%;
  max-width: 750px;
  object-fit: cover;
}

/* Responsive design */
@media (max-width: 768px) {
  .image {
      width: 100%;
      height: auto;
  }
}

@media (max-width: 480px) {
  .image {
      width: 100%;
      height: auto;
  }

  .popup-image img {
      width: 95%;
  }
}
JavaScript
Here is the code for functionality!
let images = document.querySelectorAll('.image-container img');
let popupImage = document.querySelector('.popup-image');
let popupImgElement = popupImage.querySelector('img');
let currentIndex = 0;

function showImage(index) {
    popupImage.style.display = 'flex';
    popupImgElement.style.opacity = 0;
    setTimeout(() => {
        popupImgElement.src = images[index].getAttribute('src');
        popupImgElement.onload = () => {
            popupImgElement.style.opacity = 1;
        };
        currentIndex = index;
    }, 200);
}

images.forEach((image, index) => {
    image.onclick = () => {
        showImage(index);
    };
});

document.querySelector('.popup-image span').onclick = () => {
    popupImage.style.display = 'none';
};

document.querySelector('.popup-image .next').onclick = () => {
    currentIndex = (currentIndex + 1) % images.length;
    showImage(currentIndex);
};

document.querySelector('.popup-image .prev').onclick = () => {
    currentIndex = (currentIndex - 1 + images.length) % images.length;
    showImage(currentIndex);
};
Download Source Code
Popup image gallery is designed to display a small number of high quality images on any website hence the source code for pop up image gallery is as follows:
Conclusion
The Popup Image Gallery in HTML, CSS, and JavaScript is a very useful built-in tool to enhance your web experience. When using this code, you can achieve a great looking image gallery designed to improve the users’ experience.
If you are going to apply this code into your projects, please do not forget to give due credit to JV Source Codes and link back to my website. In case of any problem that you face or changes that you want to be included, kindly leave a comment and get a reply from me.

