

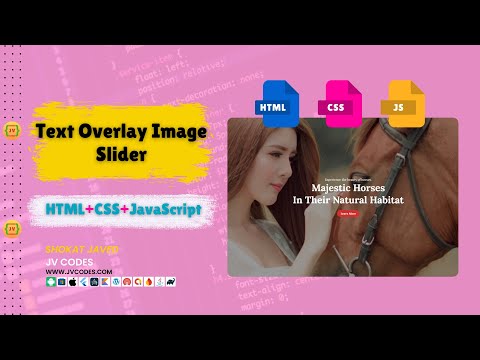
Text Overlay Image Slider in HTML, CSS and JavaScript
Text overlay image slider in HTML, CSS, and JavaScript is an effective technique to create appealing images with textual descriptions. This type of slider increases the engaging factor of your site and looks professional at the same time.
In this article, I will include free source codes for the text overlay image slider interested readers can use. In this tutorial, we will explain how to create a simple slider with a good design that can be easily implemented and customized.
GitHub Source: Text Overlay Image Slider
Features
The Text Overlay Image Slider comes with several features that make it a versatile choice for modern websites:
- Text Overlays: Every slide features on-screen text providing extra facts of the services provided on website.
- Responsive Design: It is responsive in a sense that it can adjust its design depending on the available space not only in desktop computers but in other hand held devices as well.
- Smooth Transitions: Get a professional look with smooth slide transitions and animations.
- Easy Integration: Works with all the new-generation CMS platforms such as WordPress and can be implemented into custom HTML-based layouts.
Looking for free source codes for stunning image galleries? Explore these amazing options now!
- 3D Rotating Image Gallery
- Dynamic Image Gallery
- Modern Image Gallery
- Responsive Image Gallery
- Popup Image Gallery
Technologies Used
The Text Overlay Image Slider utilizes the following technologies:
- HTML
- CSS
- JavaScript
Video Preview
Here is a short demo of what is the Text Overlay Image Slider:
Steps to Build Image Slider
Follow these simple steps to create your own Text Overlay Image Slider:
Create Project Folder: First of all, you need to create a folder on your computer under the name Image Slider.
Create Images Folder: To do so, create a new folder within the Image Slider folder and name it images, because that’s where the slider images will be stored.
Create index.html: You should create a file with the name index.html inside the Image Slider folder.
Create style.css: Now create style.css file inside project folder.
Create script.js: Finally, make the script.js to give function the slider.
To implement code you may need VS Code Installation.
HTML
Here is the HTML code for your index.html file.
<!DOCTYPE html>
<!-- JV Source Codes | www.jvcodes.com -->
<html lang="en">

<head>
  <!-- Meta Tags -->
  <meta charset="UTF-8" />
  <meta http-equiv="X-UA-Compatible" content="IE=edge" />
  <meta name="viewport" content="width=device-width, initial-scale=1.0" />

  <!-- Page Title -->
  <title>Website Image Slider</title>

  <!-- Swiper's CSS for slider styling -->
  <link
    rel="stylesheet"
    href="https://cdn.jsdelivr.net/npm/swiper@11/swiper-bundle.min.css"
  />

  <!-- Custom CSS for additional styling -->
  <link rel="stylesheet" href="style.css" />
</head>

<body>
  <!-- Main Section for the Image Slider -->
  <section class="main swiper mySwiper">
    <!-- Slider Wrapper to contain all slides -->
    <div class="wrapper swiper-wrapper">
      <!-- Slide 1 -->
      <div class="slide swiper-slide">
        <img src="images/pet5.jpg" alt="Horse" class="image" />
        <div class="image-data">
          <span class="text">Experience the beauty of horses.</span>
          <h2>Majestic Horses <br />In Their Natural Habitat</h2>
          <a href="#" class="button">Learn More</a>
        </div>
      </div>

      <!-- Slide 2 -->
      <div class="slide swiper-slide">
        <img src="images/pet8.jpg" alt="Dog and Cat" class="image" />
        <div class="image-data">
          <span class="text">Meet our beloved pets.</span>
          <h2>Dogs and Cats <br />Playing Together</h2>
          <a href="#" class="button">Meet Them</a>
        </div>
      </div>

      <!-- Slide 3 -->
      <div class="slide swiper-slide">
        <img src="images/pet3.jpg" alt="Parrot" class="image" />
        <div class="image-data">
          <span class="text">Colorful and vibrant personalities.</span>
          <h2>Exotic Parrots <br />In Full Splendor</h2>
          <a href="#" class="button">Discover More</a>
        </div>
      </div>

      <!-- Slide 4 -->
      <div class="slide swiper-slide">
        <img src="images/pet4.jpg" alt="Eagle" class="image" />
        <div class="image-data">
          <span class="text">The power of nature in flight.</span>
          <h2>Majestic Eagles <br />Soaring High</h2>
          <a href="#" class="button">Explore Eagles</a>
        </div>
      </div>
    </div>

    <!-- Navigation Buttons for Swiper -->
    <div class="swiper-button-next nav-btn"></div>
    <div class="swiper-button-prev nav-btn"></div>

    <!-- Pagination for Swiper -->
    <div class="swiper-pagination"></div>
  </section>

  <!-- Swiper JS Library -->
  <script src="https://cdn.jsdelivr.net/npm/swiper@11/swiper-bundle.min.js"></script>

  <!-- Custom JavaScript for initializing Swiper -->
  <script src="script.js" defer></script>
</body>

</html>
CSS
Here is the complete code for style.css file to style the slider.
/* Import Google Fonts - Lora */
@import url("https://fonts.googleapis.com/css2?family=Lora:wght@400;700&display=swap");

/* Universal Styles */
* {
  margin: 0;
  padding: 0;
  box-sizing: border-box;
  font-family: "Lora", serif; /* Changed font to Lora */
}

/* Main Section Styling */
.main {
  height: 100vh;
  width: 100%;
}

/* Wrapper and Slide Styling */
.wrapper,
.slide {
  position: relative;
  width: 100%;
  height: 100%;
}

/* Hide Overflow in Slide */
.slide {
  overflow: hidden;
}

/* Overlay for Slide */
.slide::before {
  content: "";
  position: absolute;
  height: 100%;
  width: 100%;
  background-color: rgba(0, 0, 0, 0.4);
  z-index: 10;
}

/* Image Styling */
.slide .image {
  height: 100%;
  width: 100%;
  object-fit: cover;
}

/* Image Data Positioning and Styling */
.slide .image-data {
  position: absolute;
  top: 50%;
  left: 50%;
  transform: translate(-50%, -50%);
  text-align: center;
  width: 100%;
  z-index: 100;
}

.image-data span.text {
  font-size: 18px;
  font-weight: 400;
  color: #fff;
}

.image-data h2 {
  font-size: 56px;
  font-weight: 700; /* Increased font weight for emphasis */
  color: #fff;
}

/* Button Styling */
a.button {
  display: inline-block;
  padding: 10px 20px;
  border-radius: 25px;
  color: #fff; /* Button text color */
  background: #d32f2f; /* Deep red background */
  text-decoration: none;
  margin-top: 25px;
  font-weight: 700; /* Bold button text */
  transition: all 0.3s ease;
}

a.button:hover {
  color: #fff;
  background-color: #b71c1c; /* Darker red on hover */
}

/* Swiper Navigation Button Styling */
.nav-btn {
  height: 50px;
  width: 50px;
  border-radius: 50%;
  background: rgba(255, 255, 255, 0.3);
}

.nav-btn:hover {
  background: rgba(255, 255, 255, 0.4);
}

/* Position Navigation Buttons */
.swiper-button-next {
  right: 50px;
}

.swiper-button-prev {
  left: 50px;
}

/* Swiper Navigation Icon Styling */
.nav-btn::before,
.nav-btn::after {
  font-size: 25px;
  color: #fff;
}

/* Pagination Bullets Styling */
.swiper-pagination-bullet {
  opacity: 1;
  height: 12px;
  width: 12px;
  background-color: #fff;
  visibility: hidden;
}

.swiper-pagination-bullet-active {
  border: 2px solid #fff;
  background-color: #d32f2f; /* Deep red for active bullet */
}

/* Responsive Design for Smaller Screens */
@media screen and (max-width: 768px) {
  .nav-btn {
    visibility: hidden;
  }

  .swiper-pagination-bullet {
    visibility: visible;
  }
}
JavaScript
The below JavaScript renders and manages transitions between two slides when the “Next” and “Prev” are pressed.
// Initialize Swiper with options
var swiper = new Swiper(".mySwiper", {
  // Number of slides to show at once
  slidesPerView: 1,

  // Enable infinite loop for continuous scrolling
  loop: true,

  // Configuration for pagination
  pagination: {
    el: ".swiper-pagination", // Selector for the pagination element
    clickable: true, // Allow pagination bullets to be clickable
  },

  // Configuration for navigation buttons
  navigation: {
    nextEl: ".swiper-button-next", // Selector for the "next" button element
    prevEl: ".swiper-button-prev", // Selector for the "previous" button element
  },
});
Download Source Code
The Source Codes for the Text Overlay Image Slider is also available for download free of charge. All the files, images in the package are arranged with no issue of copyright infringement. You are welcome to use the code in this article as is, or modify it as per your needs.
Conclusion
The Text Overlay Image Slider in HTML, CSS, and JavaScript is a wonderful feature for any site. With the help of these steps and inserting the provided code, anyone will be ready to use it on your site.
Please remember to attribute JV Source Codes by providing links back to our website. In case of any problem or any ideas that you would like me to talk about, feel free to comment on this post. For more such tips and tutorial, you can always check out more of our videos.


This slider looks super clean and the tutorial is really clear, jvcodes! I’m planning to use this for a portfolio site. Do you have any tips on optimizing the image loading performance, especially for larger images, when using this setup? Thanks a lot for the free code!
Loving the clean design of this slider! Is it mobile-friendly by default, or does that need extra media queries?